
Guides & videos
Settings — making the app your own
In short: this screen records nothing; it sets up everything else. Three settings deserve five minutes right after installation; you will discover the others as you go.
General
| Setting | What it does |
|---|---|
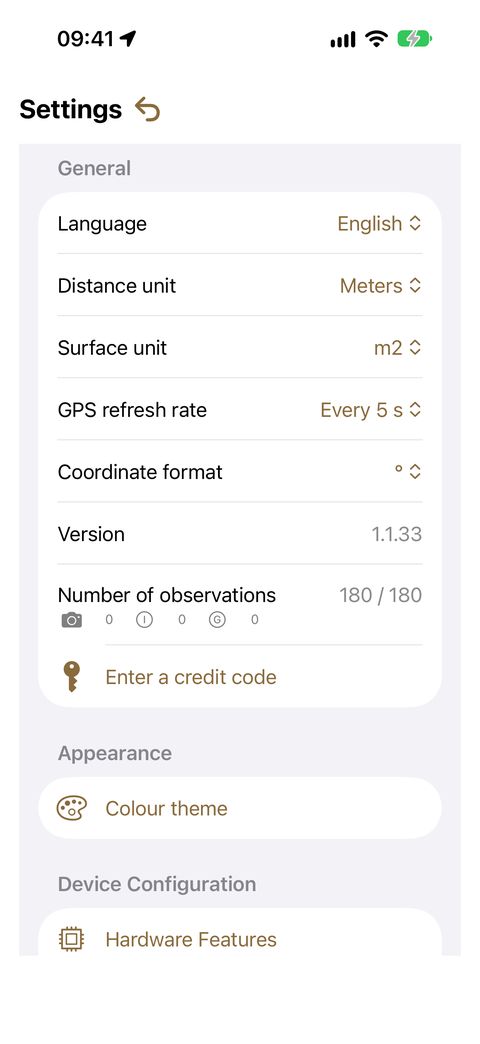
| Language | ten languages available. The app adopts your iPhone's language; change it here if needed. The change is immediate. |
| Distance unit | Meters or Inches. |
| Surface unit | m2 or Hectares. In hectares, areas are displayed the forester's way: 2 ha 34 a 17 ca. |
| GPS refresh rate | from Every 1 s to Every 15 s. More frequent = more responsive, but heavier on the battery. Every 3 s is a good compromise. |
| Coordinate format | decimal degrees, degrees-minutes, degrees-minutes-seconds, or Lambert 93 — the official French system, used by the land register. |
| Version | the installed version, to quote if you report a problem to us. |
| Number of observations | your credit balance, remaining / total, with the breakdown by type of action. |
| Enter a credit code | to add credits (see below). |
Appearance
Colour theme offers four presentations: the standard iOS colours, or the Forest theme — which follows your iPhone's light/dark mode, or which you can force to light or dark.
Overlay color sets, in a single choice, everything superimposed on the image: the rotating map and the sight of the compasses, their reticle, and the basal area reticle with the heading and distance shown below it. Choose whatever contrasts best with your terrain.
Device Configuration
Hardware Features
An inventory of what your iPhone can do: camera (with the zoom levels actually available), LiDAR, GPS, compass, microphone.
Each capability has a status:
| Status | What it means |
|---|---|
| 🟢 Active | present and authorized — everything works |
| 🟠 Inactive | present but not authorized — to be unlocked in the iPhone Settings |
| ⚫ Unavailable | not on your model — nothing to do |
This is the screen to open first when a feature does not respond: it tells you whether the problem can be fixed or not.
Relascope Configuration
A wizard guides you through two steps:
- Reference mark — on a vertical surface (wall, door, screen), display a horizontal mark 2 cm wide.
- Positioning and adjustment — stand 1 metre from the mark. The measured distance is displayed live to confirm your position. Then adjust the spacing of the marks (−/+) until they frame the mark exactly, and confirm.
The setting is saved for each zoom level. Five minutes, once.
Observations
Indexing precision — the most important setting in the app.
It is the radius within which a newly created observation is automatically attached to the nearest domain, when you are not inside any drawn parcel.
| Value | Consequence |
|---|---|
| too small | your observations stay unattached, and the New button stays greyed out outside parcels |
| too large | your observations may be attached to the wrong domain, if two properties are neighbours |
A few hundred metres suits most situations. If your domains are close to one another, reduce it; if you cover large forest blocks, increase it.
Delete photos without confirmation — if you sort a lot, this option spares you a question at each deletion. Use with care: deleting also removes the photo from your photo library.
Voice input
Delete recordings without confirmation — same logic as above, for voice notes.
Tools
Tree diameter correction factor (in %) — to align the LiDAR measurement with your forestry calliper.
How to set it: measure five or six trees with both instruments. If the app consistently reads 3 % too high, enter the corresponding correction. Your next measurements will take it into account. See the Tools guide.
Mapping
These settings apply to recording a track.
| Setting | What it does |
|---|---|
| Vibrate on measurement | your iPhone vibrates at each point recorded |
| Play sound on measurement | a sound plays at each point recorded |
| Sound choice | Cheer, Droplet, Note or Bounce |
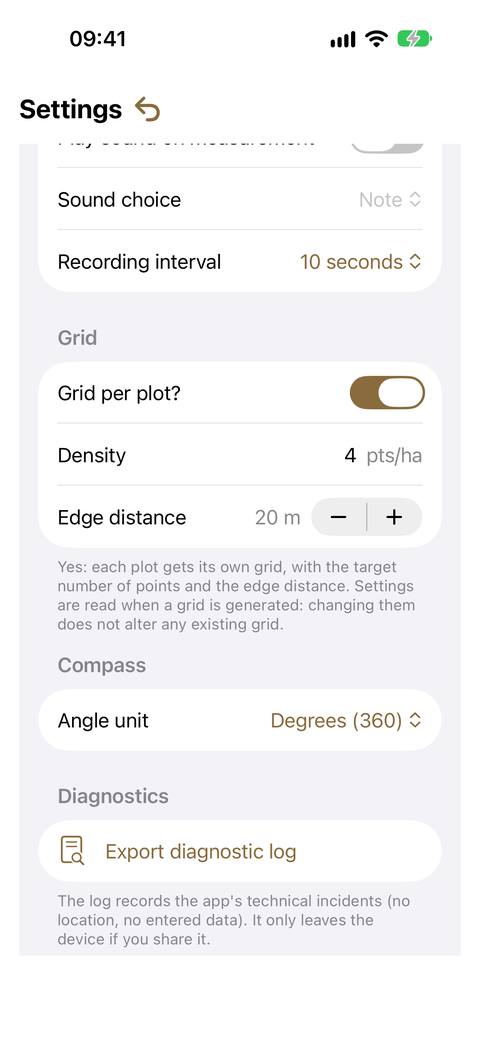
| Recording interval | 5, 10, 20 or 30 seconds between two points |
Grid
These settings drive the automatic grid of a parcel (see the Mapping guide).
| Setting | What it does |
|---|---|
| Grid per plot? | Yes (default): each parcel gets its own grid. No: a single grid for the whole domain, starting from the domain location, cut by the parcels |
| Density | number of points per hectare (pts/ha), from 0.1 to 50; decimals allowed — 0.5 for one sample plot every 2 ha. 4 by default |
| Edge distance | minimum distance between a point and the parcel boundary, from 0 to 100 m in steps of 5; 20 m by default. Greyed out when Grid per plot? is set to No: it does not apply to the domain grid |
To enter the density, tap the field, type the value, then OK above the keyboard.
Compass
| Setting | What it does |
|---|---|
| Angle unit | degrees (360) or gradians (400) — the surveying and forestry convention |
The overlay colour is set in Appearance (above).
Adding credit
General ▸ Enter a credit code.
- Buy your credits on forest-assist.fr. You receive a code by email.
- In the app, open Enter a credit code.
- Paste the code into the Credit code field, then tap Confirm.
- The message "Credit added." confirms it. Your balance is updated immediately.
Good to know:
- The check is done on your iPhone, with no network: you can top up in the forest.
- Credits add up and never expire.
- A code is valid only once: "Code already used." means it has already been added to your balance.
- "Invalid code.": check that you pasted the whole code, without adding anything. Spaces and line breaks are tolerated.
When your balance is running low, the message "Credit almost used up." appears below the counter. At zero, only three actions are suspended (photography, inventory, basal area): your data remains fully accessible and exportable.
Good to know
- Number fields (density, correction factor, indexing precision) are closed with the OK button above the keyboard, or by scrolling the screen.
- Every change is immediate: there is no "Apply" button.
- There is no reset to factory settings. Note down your settings before experimenting, in particular the Indexing precision.
- Your settings are included in your exports: the recipient of a backup knows which units you were working in.